The Clockwork Maze
Doors and Levers
A long zig-zagging stairway led down to a small chamber. Their descent was hampered by Thyrus meticulously checking every landing for traps - but at least it gave Sir Godfrey opportunity to eat his sandwiches! On the north wall, a panel with two bronze levers - one red and one black - was set chest-high in the wall. To the east, an archway led to an alcove. Distant ticking echoed through the walls, as if several large clocks were operating simultaneously. There were no exits.
After pondering the levers for some time, Seawyr eventually pushed one down, causing a distant grinding of gears to echo, but noting visibly changed. Eventually pushing the other lever, another sound of grinding clockwork opened a passageway in the alcove.
 The passageway turned sharply left then led to a set of double
doors. Once Thyrus proclaimed them "trap-free2, Yangrit opened the
doors. Beyond a variety of artwork and keepsakes were displayed on the
walls of the chamber: a tapestry depicting a royal court, an oddly
melted lump of iron on a pedestal, a heavy mace hanging on the wall, and
a broken staff lay on another pedestal. While Thyrus went to examine
the mace, which seemed, oddly, to be made of wood, Seawyr's attention
was drawn to the broken staff. As he picked it up however a jagged arc
of lightning jumped across the room, catching him and Yangrit, while
Thyrus managed to evade it.
After shaking off the jolt of electricity and perusing the staff carefully, Seawyr was bale to decipher the name "Jharun" carved into the wood, Thyrus observed that was the name of one of the missing wizards they had been asked to keep and eye out for. Deciding to take the mace, Thyrus carefully checked the doors leading out of this room for traps.
The doors led to a passageway beyond which, after Thyrus unlocked a heavy wooden door, they found some cells, where an unconscious wizard lay in a heap. After some medical attention from both Tamarie and Yangrit the wizard recovered enough to inform them he was indeed Jharun and he and his companion Tiawask had been captured by a brass minotaur and then dragged before the master of this level, a Numerian wizard named Klarkosh. Klarkosh had accused them of spying on him and then had them beaten and imprisoned. Tiawask had managed to escape using a potion of gaseous form hidden in her boot-heel and had left to get help. However, after her escape had been discovered, Jharun had been subject to being beaten and starved over the intervening days and seemed traumatised by what had happened to him.
Pressing on, and passing by what seemed to be a bathhouse, they Party arrived at what looked like a reception chamber. A padded chair stood on a low dais at the eastern end of the room. A large emblem made from hammered brass hung on the wall behind the chair, depicting an automation’s head between interlocking gears. The remaining walls were draped with blue coloured tapestries, except in the northeast corner, where a curving wall of green crystal intruded into the chamber—the Emerald Spire. On the northern wall was a control panel with one black lever. Two doors exited through opposite sides of a small nook to the southeast. A pair of seven-foot tall automatons armed with pole-arms stood guard in the chamber. Eerie green light flickers in the joints of their armour.
The emerald automatons proved formidable foes, but Tamarie managed to keep everyone alive and eventually the combined attacks of the Party wore them down. After the combat was over, the Party found one of the doors in the nook led to a sleeping chamber where they liberated some treasure from a chest and a notebook full of automaton designs. The other door seeming led to a blank wall, but moving the black lever revealed a passageway heading east.The Machine Room
Exhausted by their efforts and nearly out of spells, the Party decided to rest in the bedchamber near the Reception Chamber. This proved to be a mis-step as part way through the night several Emerald Automatons arrived to eject them. At first the Party thought that they were trapped, but Juntrik spotted a secret door that allowed them to flee, hidden by an obscuring mist from Seawyr. Strangely, the Emerald Automatons did not pursue them.
The headed back towards the exit but found that the passageway had
now reconfigured and led to a set of doors that Jhaurn informed them let
to the "metal bull" that had easily captured him and Tiawask. There
were no levers nearby to move things around again, so the Party slumped,
believing themselves to be trapped.
After an exhausting search of the surrounding area Yangrit revealed a secret door in the Trophy Chamber, which led to a huge chamber. A heavy brass housing in the middle of the room covered a clockwork arrangement of gears and cogs, that clanked loudly as they slowly move. Revolving camshafts and rocker mechanisms extended from the housing to various points in the ceiling, driving unseen mechanisms. The room also seemed to serve as a workshop. Nine alcoves contained unfinished automatons in various stages of assembly. There was also a panel with a red lever and a black lever set in a curved wall at the west end of the room. Doors lead east and north. Quickly experimenting with the levers Seawyr eventually managed to reopen a way to the exit. The Party retreated to the long stairway that led down to this level and rested on one of the landings.
After a nights sleep, Jhaurn felt strong enough to take himself out of the dungeon, especially after Seawyr walked him through the maps of the various levels that Thyrus had been compiling. The Party returned to the dungeon to find that the levers had been reset to the neutral position. Seawyr quickly moved the levers around until he had opened a path back to Trophy Room. Yangrit led the way back to the secret door that led to the Machine Room, finding that this time the room was occupied!
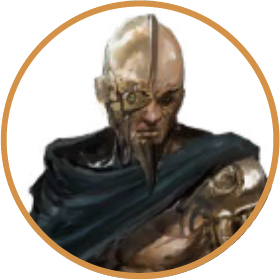
A tall and gaunt man worked there; gold plating was joined to his flesh, making him half man, half automaton. Two Emerald Automatons guarded him. On seeing Yangrit and Seawyr, Klarkosh flew into a rage accusing them of being spies and stealing his designs! He immediately ordered the automatons to seize Yangrit. As one of the automatons grabbed the druid, Seawyr cast a grease spell, causing both to fall to the ground in a tangle. The second automaton following its companion also slipped on the greasy patch. This caused Klarkosh to fly into a rage and the spells began to fly, Seawyr retaliating in kind. Eventually, things turned in the Party's favour, Seawyr and Yangrit both using flaming sphere spells to dramatic effect!The Brazen Guardian
The Party continued their exploration of the Clockwork Maze, manipulating the black and red levers pretty much randomly opening and closing passages to work their way through and map the level.
 At one point came upon a room where two clockwork servants were busy
seemingly welding and repairing piles of junk. As the Party approached
the clockwork servants fired nets from their shoulders, managing to trap
Seawyr. Before the rest of the Party could react Seawyr was grabbed and
lifted into the air, hopelessly entangled in the net. His friends
rallied round and attacked, Yangrit managing to snatch the helpless
wizard from the clockwork servant's grasp and cut him free with the
others methodically destroyed the constructs.
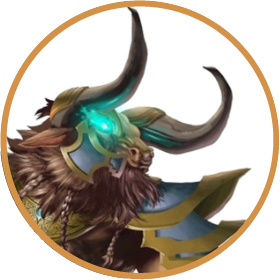
In the room beyond he discovered one of the most dangerous things yet they had encountered. Thyrus, after listening at a set of double-doors, cautiously opened them - only to be met by a large great axe swinging down hard at his head. As the thief crumpled to the floor dying, a large minotaur with clockwork components embedded in his flesh charged out - making a bee-line for Seawyr, bowling past those who stood between him and the wizard. As battle was joined, Yangrit managed to pour a healing potion into Thyrus, who rejoined the fray. Tamarie desperately channelled healing hoping to keep ever one alive. It was a close thing but eventually the minotaur which had pretty much ignored everyone save those casting spells, crumpled in a heap. After this bruising encounter, Seawyr insisted on resting and most of the Party agreed. They decided to rest in the room the minotaur had emerged from as there was a supply of fresh water in there.
While the others rested, Thyrus decided to do some scouting. Fortunately, in the northern part of the maze, he actually managed to find the way down. Unfortunately, he also managed to find a strange one-eyed monster, accompanied by a pair of fiendish leopards. Unable to deal with such a powerful foe on his own, Thyrus fled,seeking safety on the stars leading down to the next level.
About an hour later he made his way back up cautiously. Fortunately the Agash was gone, so the thief made his way quietly through the maze to rejoin his comrades.
The Hall of Steam
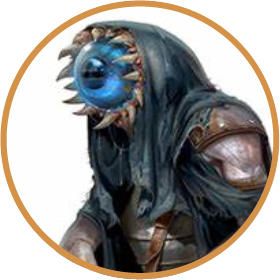
Returning to his friends, Thyrus informed them he had found the exit and also a strange one-eyed creature that had driven him off. Once he eventually awakened, Seawyr identified the creature as an aghash, warning them the creature had powerful energy resistances and was only vulnerable to holy and cold-iron weapons. Preparing as best they could they moved forward.
Seawyr, backed up by Yangrit opened the door to reveal a room where
clouds of steam formed from a fountain in the middle of it. Four heavy
stone columns supported the high ceiling, and a single red lever was
mounted in a panel on the eastern wall. Rusty remnants of two
human-sized automatons lie on the floor. Immediately they saw the
creature Thyrus had described, and just as immediately they began to
feel the effects of it's evil eye.
The aghash proved a particularly annoying foe, leaving it's fiendish leopards to distract the Part it used dimension door to move about the combat freely. As the Party chased it round the northern part of the dungeon, the aghash used bestow curse, to hamper them. When it's fiendish leopards were slain, the aghash summoned two doru - who nearly mangaed to kill Seawyr. Fortunately, Tamarie was nearby!
At some point in the combat, Juntrik opened the door to the next room. Parts of this chamber looked like they were recently excavated. To the southeast, a curving cylinder of green crystal—part of the Emerald Spire—filled a quarter of the room. Sitting in front of the Spire a small pech sat, methodically carving off slivers of crystal, a wriggling sack sat at it's feet. The pech muttered to itself in a language no one could understand. Suddenly as the aghash appeared in front of him, Juntrik sent Sherm in to battle. The aghash retaliated by filling the room with a howling sandstorm. Hastily retreating, Juntrik called Sherm back and closed the door., calling to the others that he had found their quarry. The others arrives an d they waited patiently for the sound of sand blasting against the door to abate.
Opening the door, to their surprise, the found the aghash still there, but somehow he had been petrified! Attempts to communicate with the pech proved fruitless as she completely ignored them as they tried talking to her in whatever languages they could muster. Eventually, deciding it was fruitless they headed for the stairs down.
As they descended, signs of battle—most commonly dried blood, scorch marks, and smashed bones—appeared along the stairway down. The stairs ended in the northeast corner of a small, brightly lit room with a door on the west wall. In the centre of the room were two large iron racks holding numerous burning candles. The iron candlesticks were crafted so that each candle appeared to be held in the jaws of a serpent.
Yangrit, noting a phrase was written on each rack, moved forward to investigate. As she did the candles flared up and a fireball exploded in the room!
